ADDING SPONSORS in
expositores section
Fabl Tutorials - LATAM
Step 1. Log in into your Fabl account dashboard.

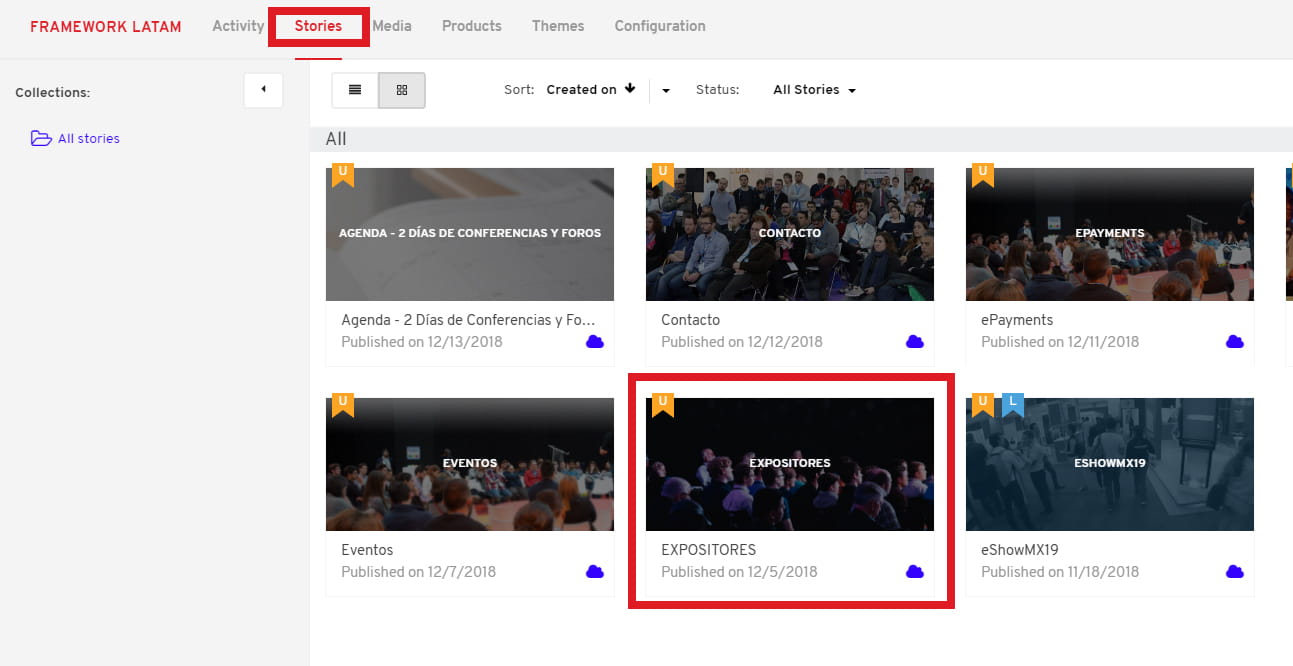
Step 2. Access the EXPOSITORES story
Go to your “Stories” tab and click on the “EXPOSITORES” story. This will open the story in editor mode.
Step 3. Adding a new sponsor.
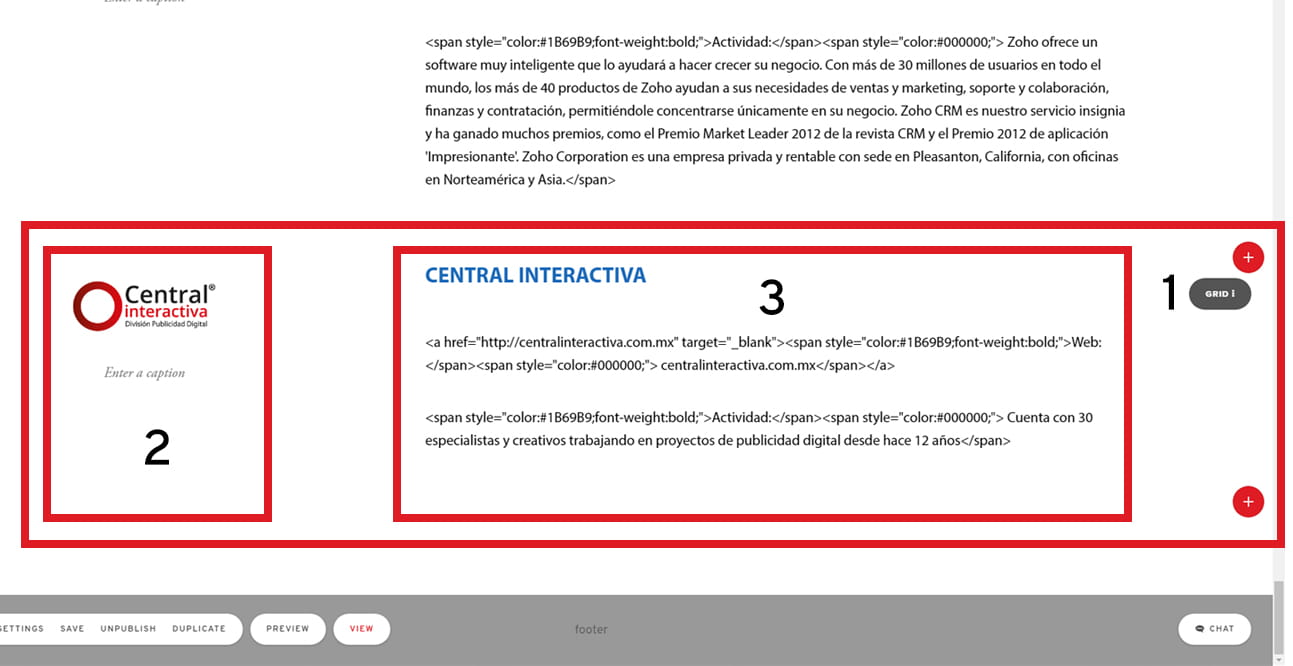
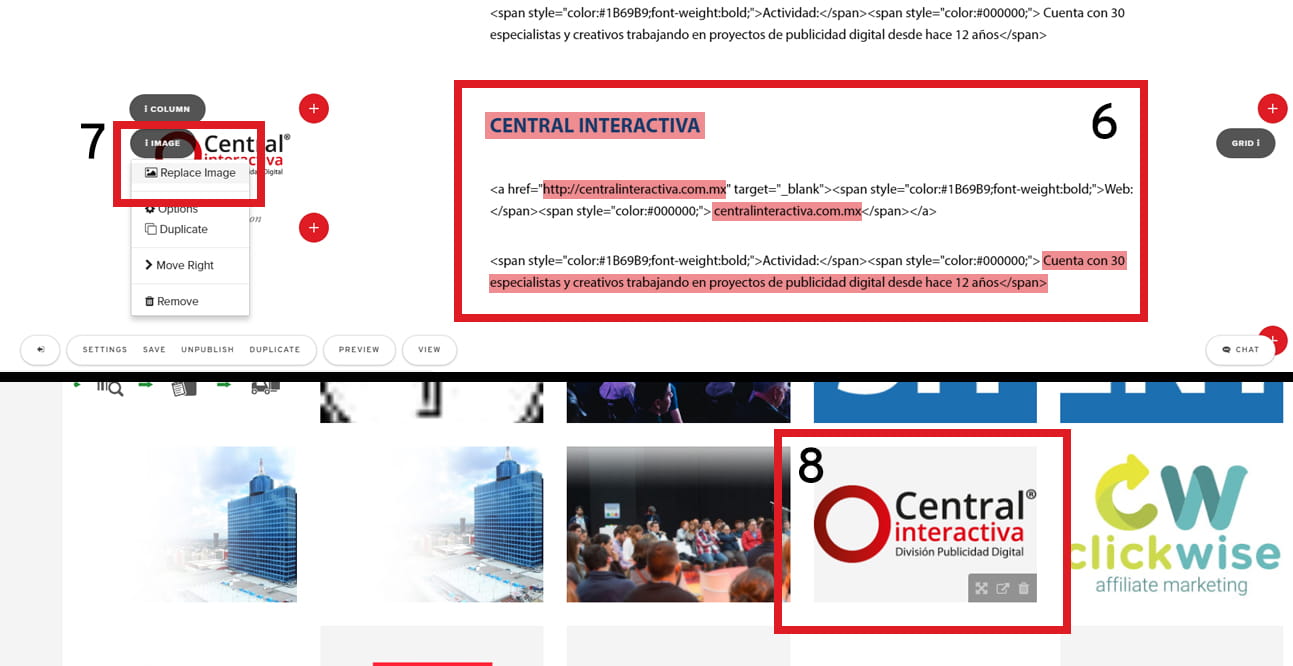
The Expositores section is built by using the platform’s GRID element (1). Each row stands for an individual sponsor and it contains a 2 column grid. The first column features the logo (2), while the second column displays the title, web address, and activity description (3).
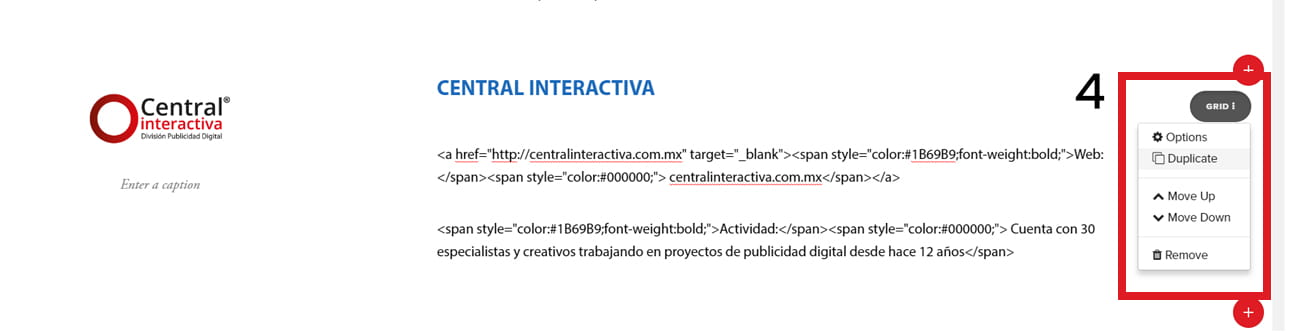
Scroll down to the position where you want to add another sponsor and duplicate the current grid from inside the grid’s drop-down menu (4).
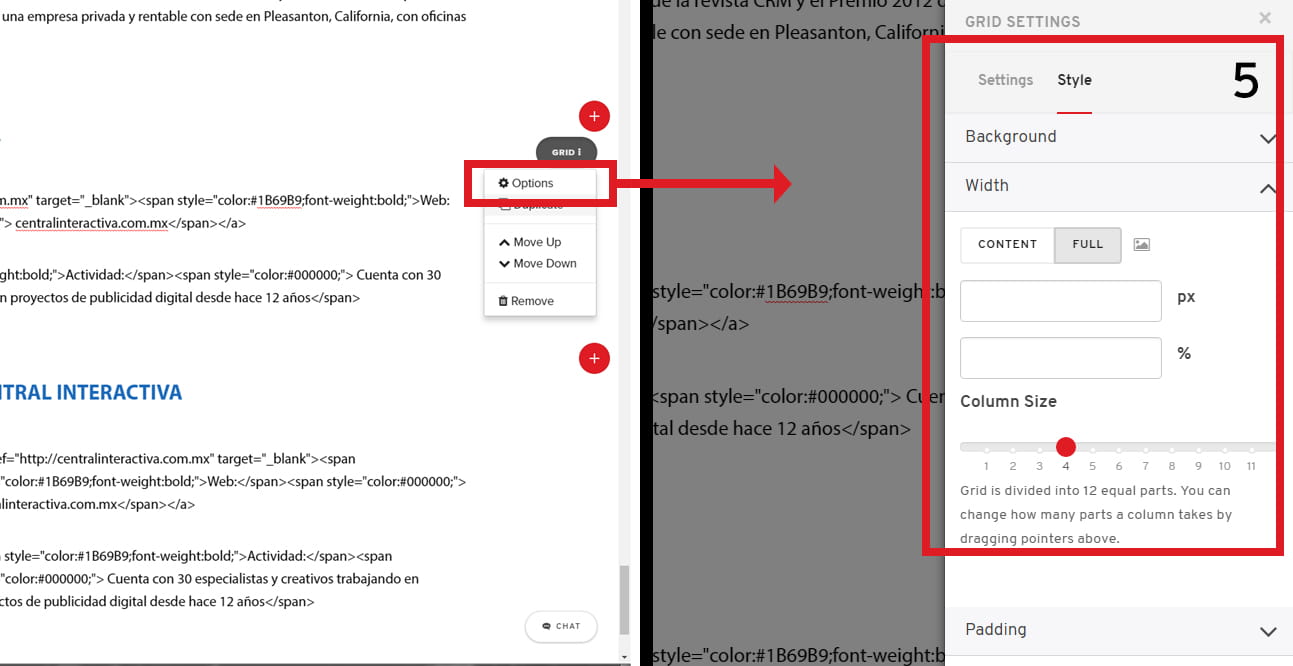
Once you create a duplicate of the grid, be sure to set the correct column sizing. In order to do this, go to Grid / Options / Style / Width / Column size. Set the dial to for value 4, just like in the image below (5).
The next step is to replace the highlighted content (6) with the new one. Once all the text edits have been made, go to the image drop-down menu and select “Replace Image” (7). This action will open the media library where you can drag and drop the required logo image. Once uploaded, simply select it from the library (8)
Please make sure the images you are uploading are all the same size. We recommend that the images be 257px wide and 378px high.
Note: All logo images should be in .png format with transparent background to avoid situations like the one presented in the image below:

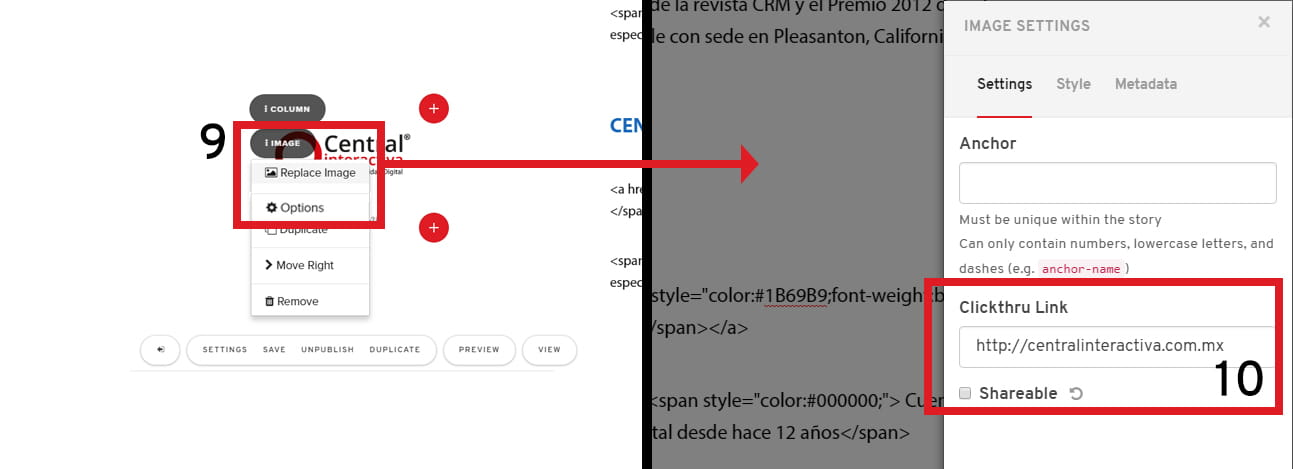
Before saving your edits, make sure to set the correct link for the logo image. In order to do this, access the image drop-down menu, select options (9). The IMAGE SETTINGS tab will open in the right side of your screen. Go to the Settings tab and paste the correct URL in the Clickthru Link field (10).
Make sure to save the story from the bottom-left menu.
