Published on 8/24/2017
You can easily animate elements in a Fabl story with the addition of a simple custom code snippet. To enable the transition, follow these steps:
- Add a CODE BLOCK anywhere in the story
- Choose a SCRIPT for the type of transition you want (immediate or delayed)
- Add STYLE snippet to your code block
- Update Settings-> Style tab -> CSS Class Names
Note: Transitions are not visible in preview mode. The story needs to be published to view animations. Also, animations are switched off on mobile devices to enhance performance.
Step 1. Insert the code block in any part of the story
Step 2. Choose one SCRIPT to apply the desired effect (immediate or delayed) and insert it into your CODE BLOCK
Script block for immediate effects.
Note: first CSS Class Name is animated-story-element
<script type="text/javascript"> loadScripts([ "https://revcbsi-a.akamaized.net/2016/Q3/22384/scrollMonitor.js" ], function() { var isMobile = window.matchMedia("only screen and (max-width: 760px)"); if (isMobile.match || isMobile.matches) { return; //prevent animation on mobile devices } $('.animated-story-element').each(function(i, element) { var watcher = scrollMonitor.create(element, {top: -$(window).height() * 0.1, bottom: -$(window).height() * 0.2}); watcher.enterViewport(function() { $(element).addClass('animated-visible'); }); }) }); </script>
Script block for effects with delay.
Note: first CSS Class Name for this group is sec-animated-element
<script type="text/javascript"> loadScripts([ "https://revcbsi-a.akamaized.net/2016/Q3/22384/scrollMonitor.js" ], function() { var isMobile = window.matchMedia("only screen and (max-width: 760px)"); if (isMobile.match || isMobile.matches) { return; //prevent animation on mobile devices } $('.sec-animated-element').each(function(i, element) { var watcher = scrollMonitor.create(element, {top: -$(window).height() * 0.1, bottom: -$(window).height() * 0.2}); watcher.enterViewport(function() { setTimeout(function(){ $(element).addClass('animated-visible'); }, 2000); }); }); }); </script>
Step 3. Insert STYLE code below into your CODE BLOCK
<style> @media screen and (min-width: 760px) { .themed-account .animation-slide-left { margin-left: -2000px; opacity: 0; transition: margin-left 1s ease, opacity 1s ease; } .themed-account .animation-slide-left.animated-visible { margin-left: 0; opacity: 1; } .themed-account .animation-slide-right { margin-right: -2000px; opacity: 0; transition: margin-right 1s ease, opacity 1s ease; } .themed-account .animation-slide-right.animated-visible { margin-right: 0; opacity: 1; } .themed-account .animation-fade-in { opacity: 0; transition: opacity 2s ease; } .themed-account .animation-fade-in.animated-visible { opacity: 1; } .themed-account .animation-bounce { opacity: 0.2; transform: scale(0.5, 0.5); transition: transform 0.4s cubic-bezier(.91, .8, .54, 1.39), opacity 0.4s ease; } .themed-account .animation-bounce.animated-visible { opacity: 1; transform: scale(1, 1); } } </style>
Step 4. Set CSS class names in settings

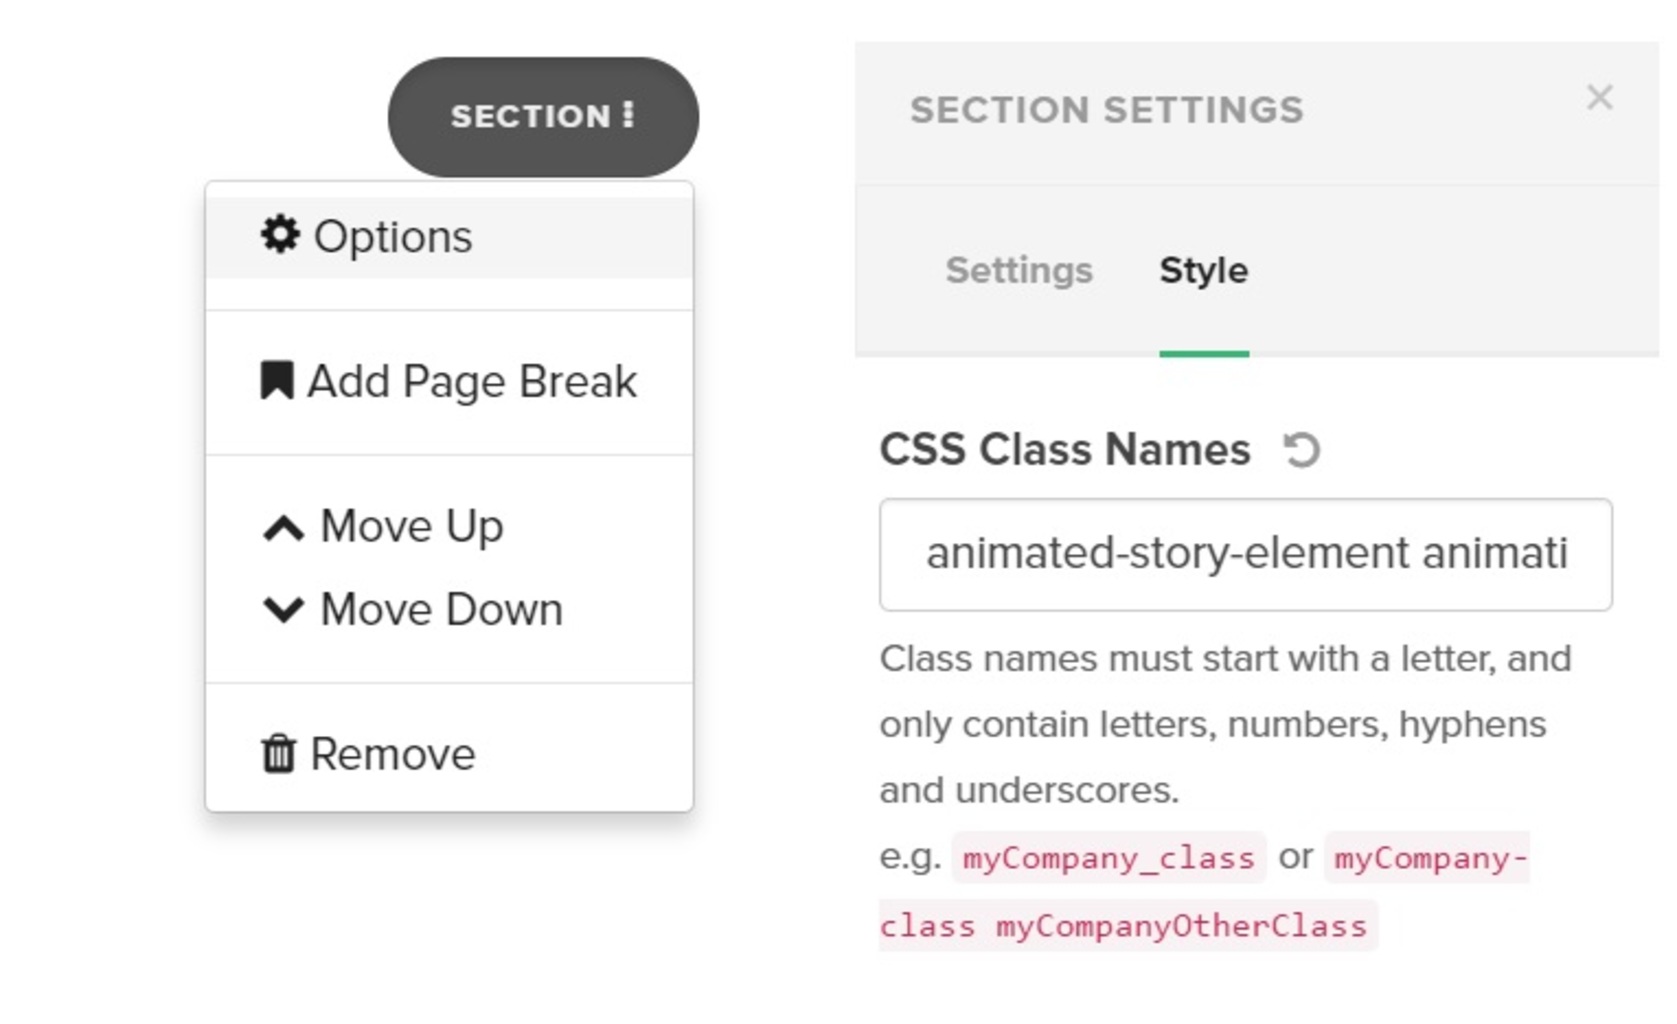
In the story Editor, open Settings in the element where the transition is needed. Update Settings-> Style tab -> CSS Class Names.
Add needed class names corresponding to the animation you would like to apply.
See below how the effects will appear in the story
This effect become visible when the element comes into your viewpoint
This effect will be visible 2 seconds after coming into your viewpoint
Slide left effect
Slide right effect
Fade in effect
Bounce effect
Slide left effect
Slide right effect
Fade in effect
Bounce effect
Note: Transitions are not visible in preview mode. The story should be published to see animations.